IP Address Management
This next section will demonstrate how to:
- Create a Regional Internet Registry
- Create a Prefix
- Create assignable IP addresses
- Assign an IP address to an Interface on a Device
These type of operations fall under an umbrella called IP Address Management (IPAM).
Creating a Regional Internet Registry (RIR)
A RIR allocates globally-routeable IP address space. There are five top-level RIRs, each responsible for a particular section of the globe. Nautobot also considers RFCs 1918 and 6589 to be RIR-like because they allocate private IP space.
Nautobot requires any IP allocation be attributed to a RIR.
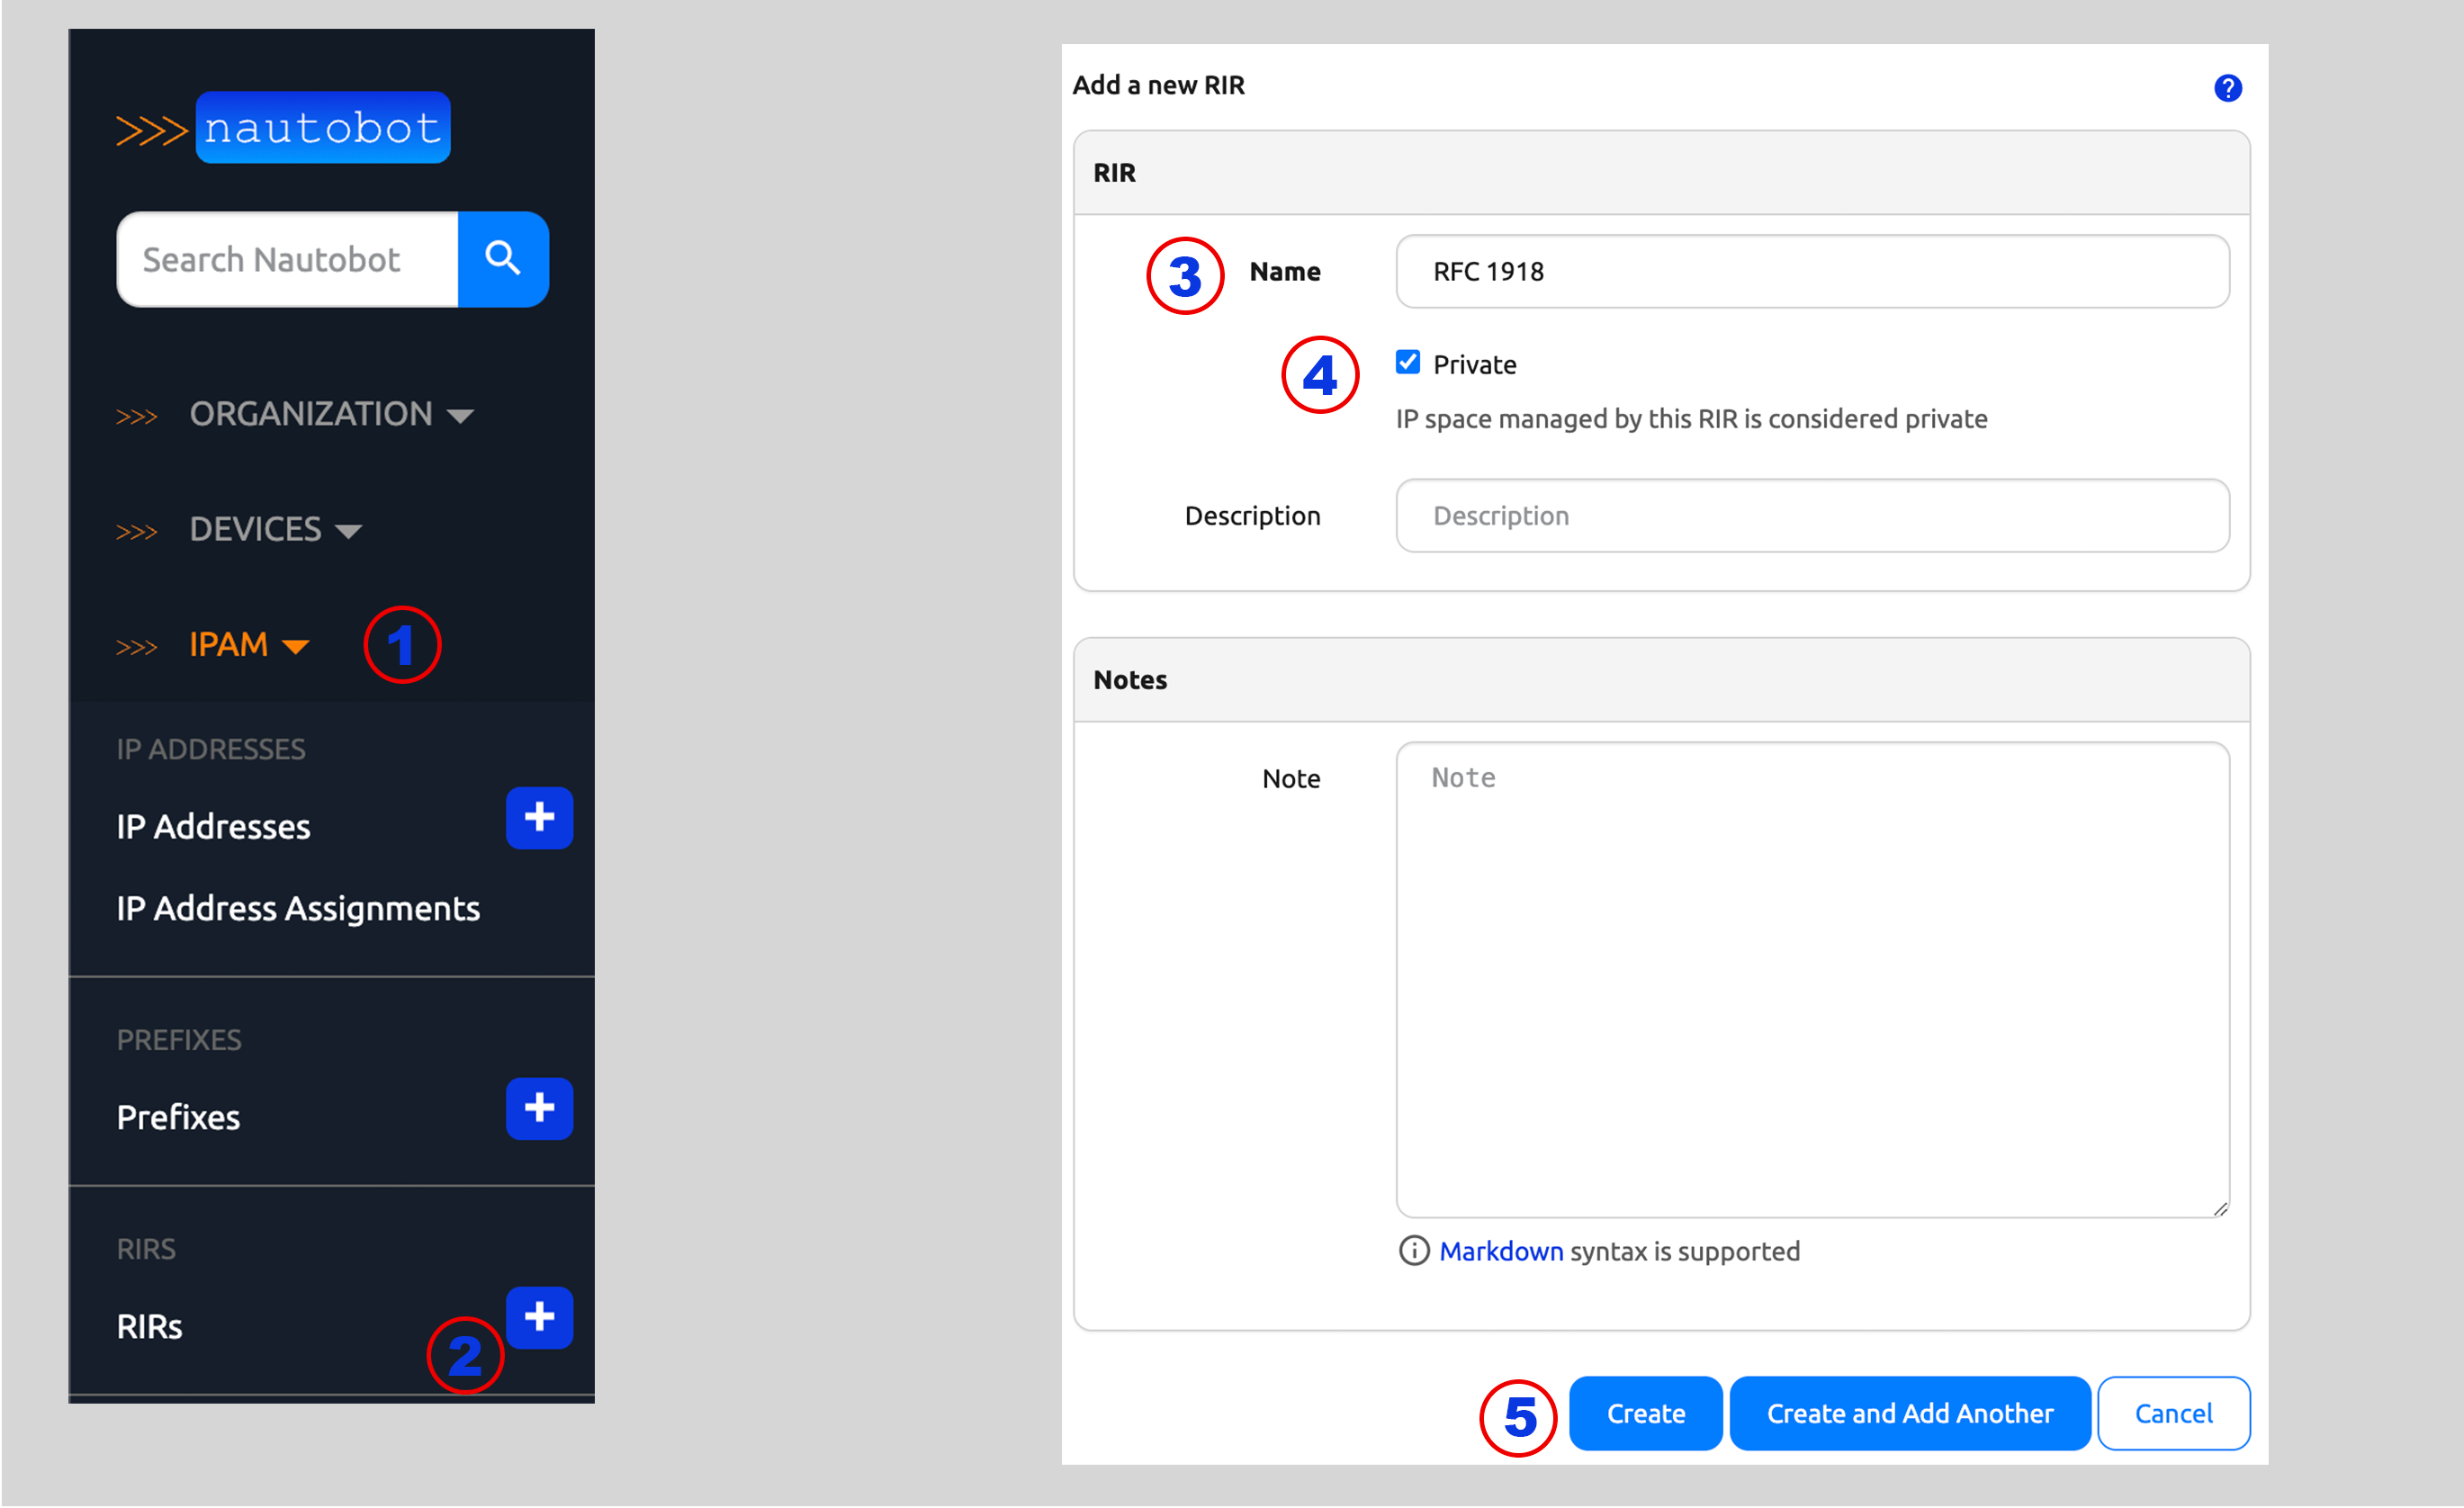
To create a RIR:
- Click on IPAM in the left sidebar menu
- Find RIRs and click on the +; this takes you to the
Add a new RIRform - Specify the RIR
Name - There is a checkbox to flag
Private(internal use) only - Click on the
Createbutton
Creating a Prefix
A Prefix is an IPv4 or IPv6 network and mask expressed in CIDR notation (e.g. 192.0.2.0/24). Each Prefix can be assigned to a particular Location, an RIR and virtual routing and forwarding (VRF) instance.
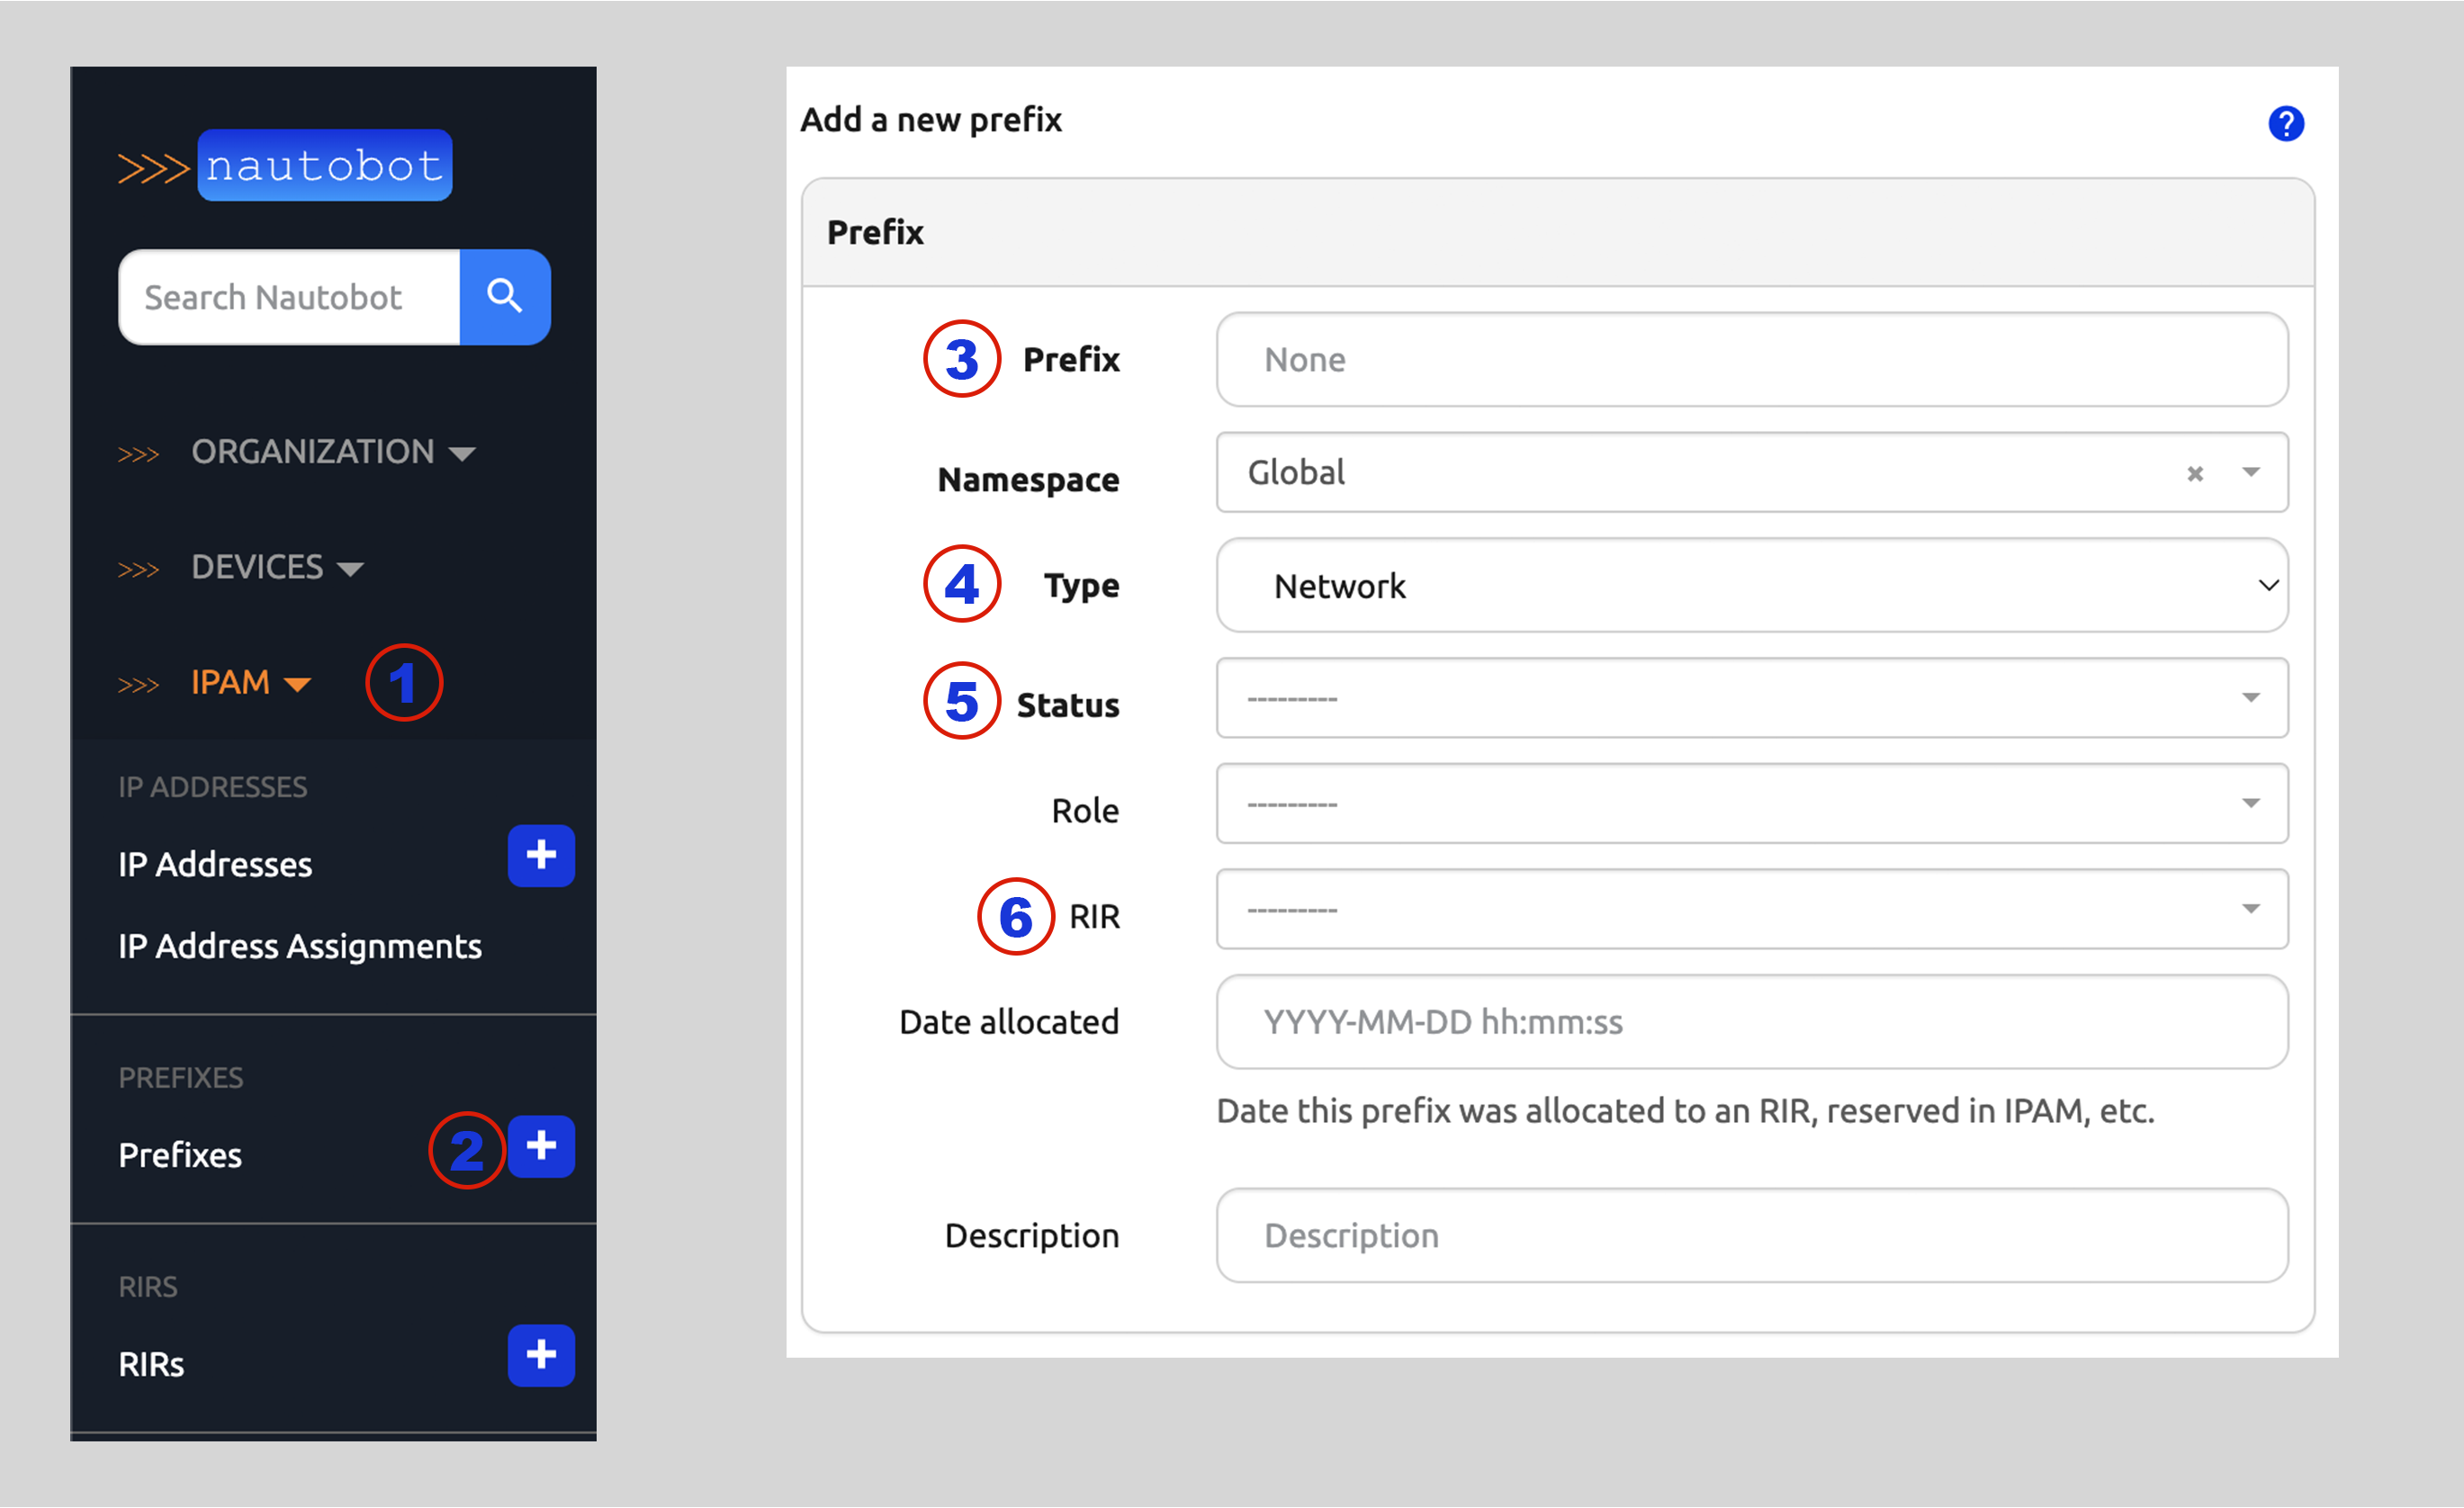
To create a prefix:
- Click on IPAM in the left sidebar menu
- Look for Prefixes and click on the +
- This will take you to the
Add a new prefixform
- This will take you to the
- Populate the
Prefixin CIDR notation - If all addresses in the Prefix are usable, change the
Typeto "Pool" - Select a
Statusfrom the drop-down selector - Optionally select a
RIRfrom the drop-down selector - Click on the
Createbutton (not shown)
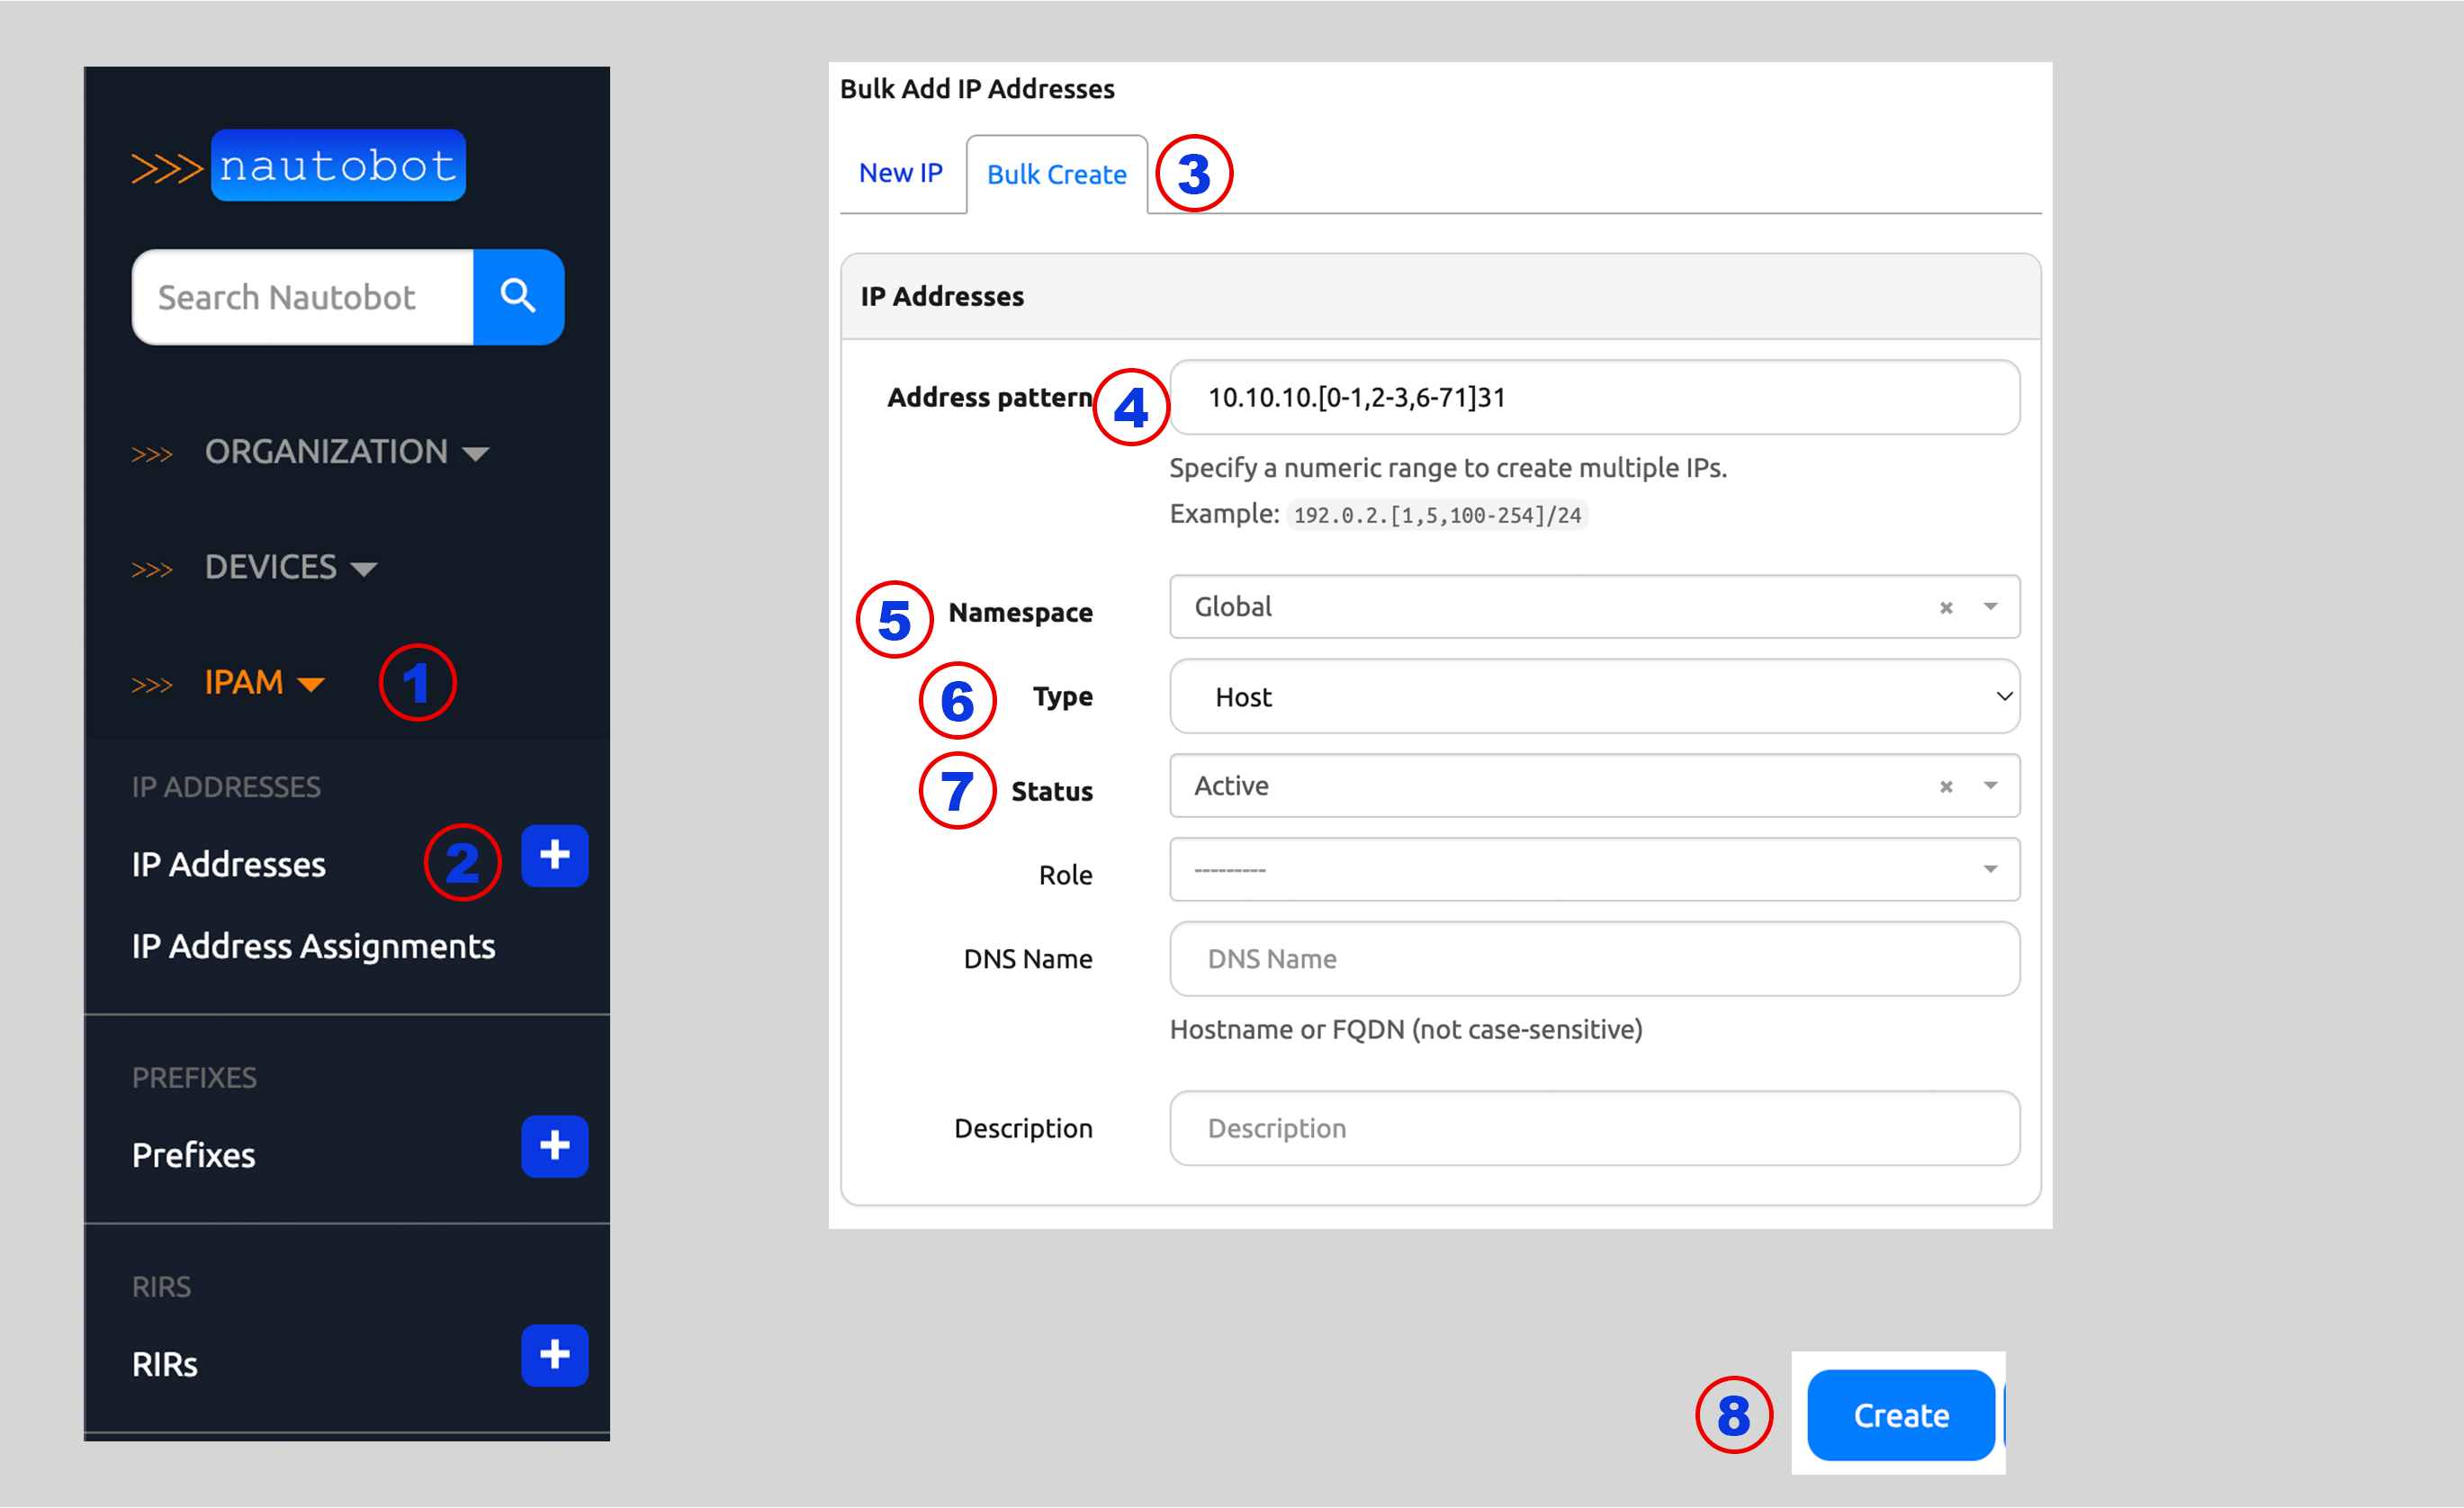
Creating IP Addresses
To create an IP address:
- Click on IPAM in the left side navigation menu
- Find IP Addresses and click on the +
- This will take you to the
Add a new IP addressform
- This will take you to the
- In this example, we are going to create multiple individual addresses, so click on the
Bulk Createtab - Populate an Address pattern
- This example uses
10.10.10.[0-1,2-3,6-7]/31to create 3 non-contiguous /31's - The specified mask should be exactly as would be configured on the Device's Interface
- This example uses
- Select
GlobalforNamespacefrom the drop-down selector - Select
HostforTypefrom the drop-down selector - Select
ActiveforStatusfrom the drop-down selector - Click on the
Createbutton
Assigning IP Addresses
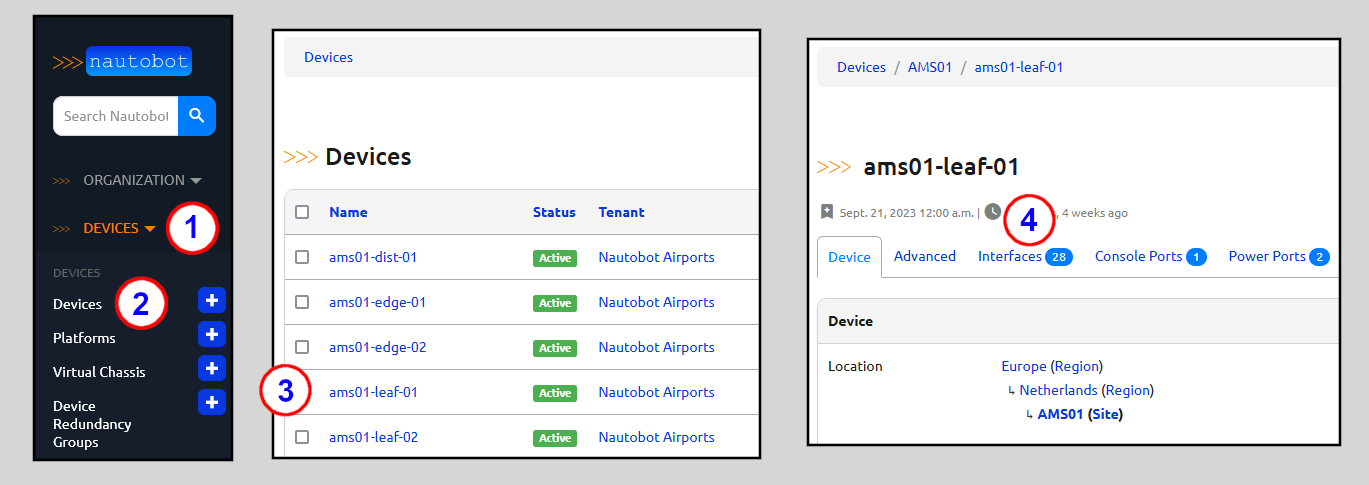
To assign an IP Address to a specific Device and Interface:
- Click on Devices in the left side navigation menu
- Click on Devices to go to the main page for Devices
- Find the Device whose Interface you wish to associate to an IP Address and click on it
- Go to the
Interfacestab and look for the row with the Interface you are interested in - Click on the edit button for the Interface (a pencil icon)
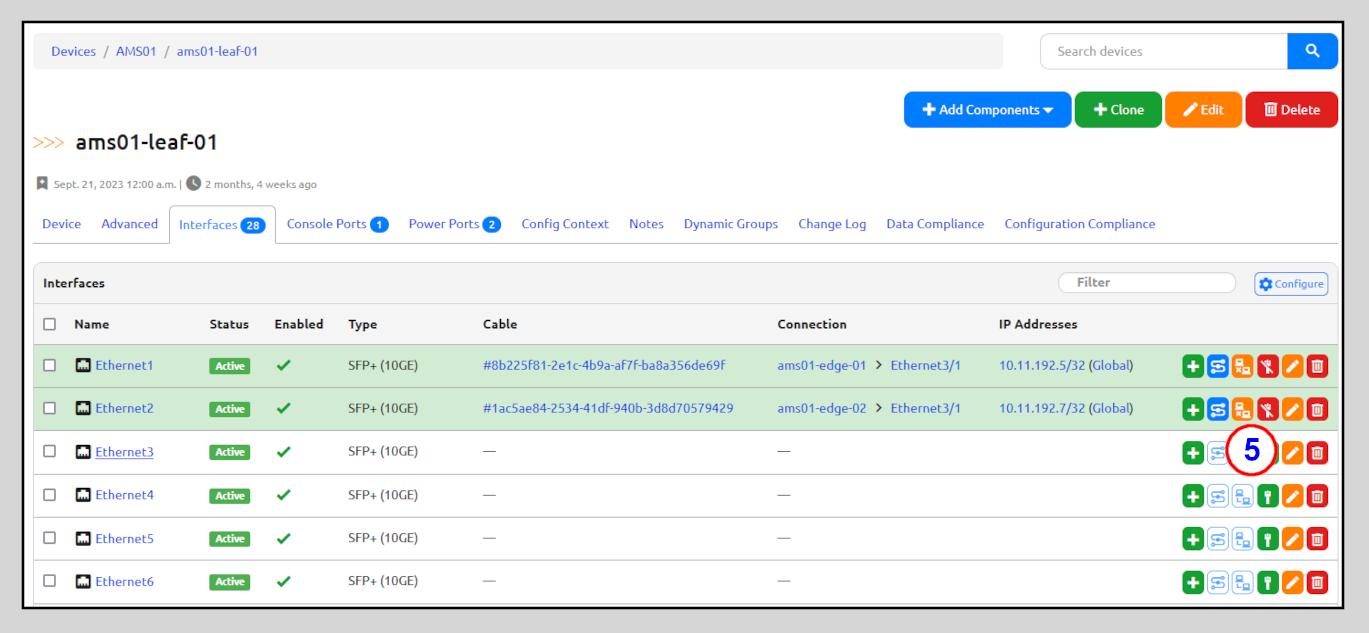
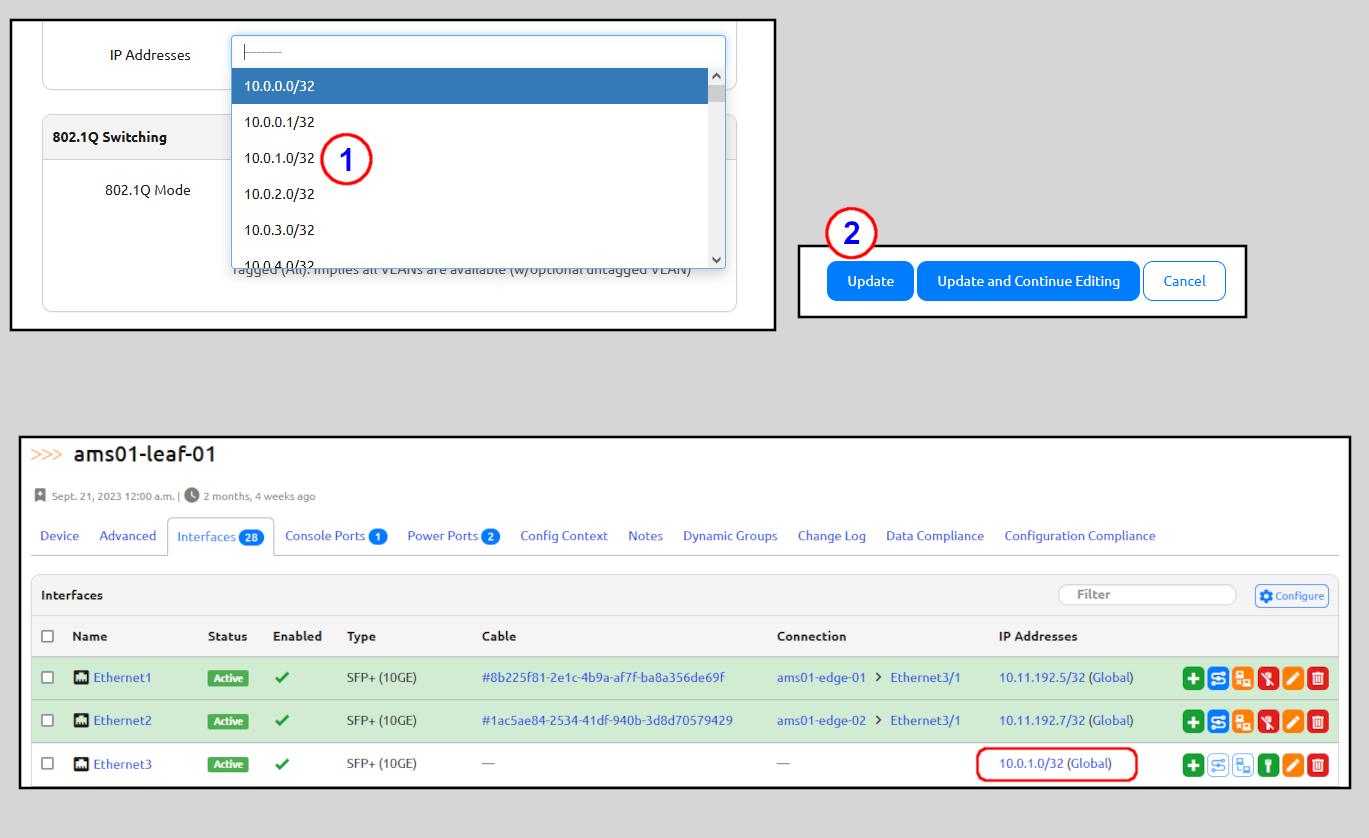
Once on the Editing Interface page:
- Select an
IP Addressfrom the drop-down selector - Click on the
Updatebutton- This will take you back to the Interfaces page for the Device, where you will see the assignment shown under the
IP Addressescolumn
- This will take you back to the Interfaces page for the Device, where you will see the assignment shown under the
Finding an IP Address for an Interface
- Click on Devices in the left side navigation menu
- Click on Devices to go to the main page for Devices
- Search for the Device you are interested in (
ams01-edge-01in this example) and click on the link to go to the main page for the Device - Go to the
Interfacestab and look for the row with the Interface you are interested in; find the IP Address(es) in the IP Addresses column in the row

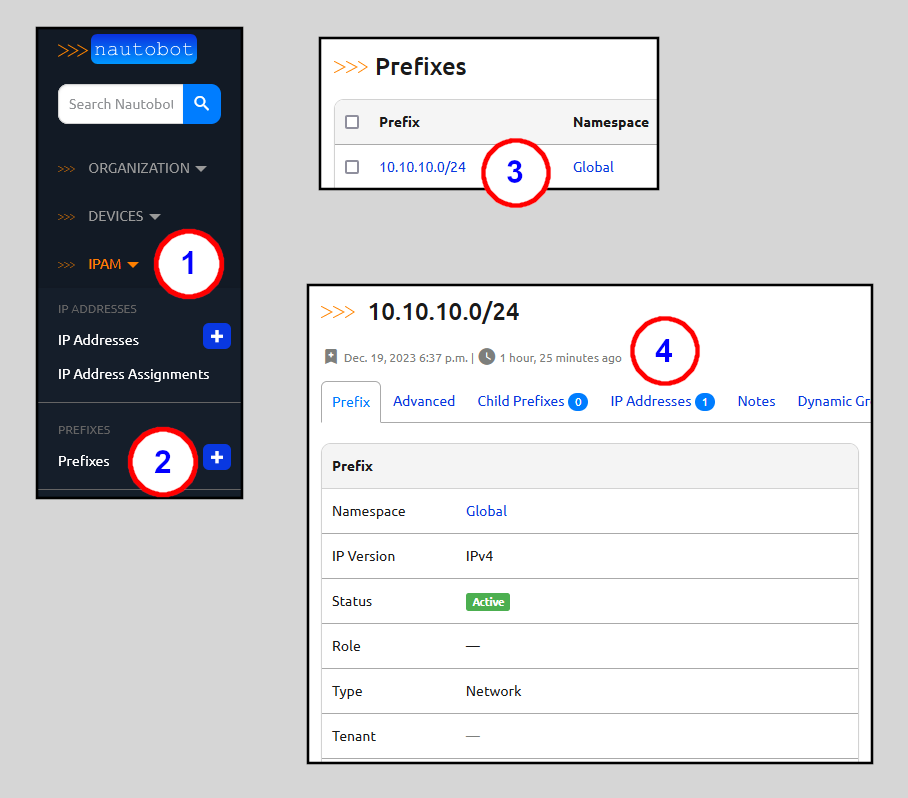
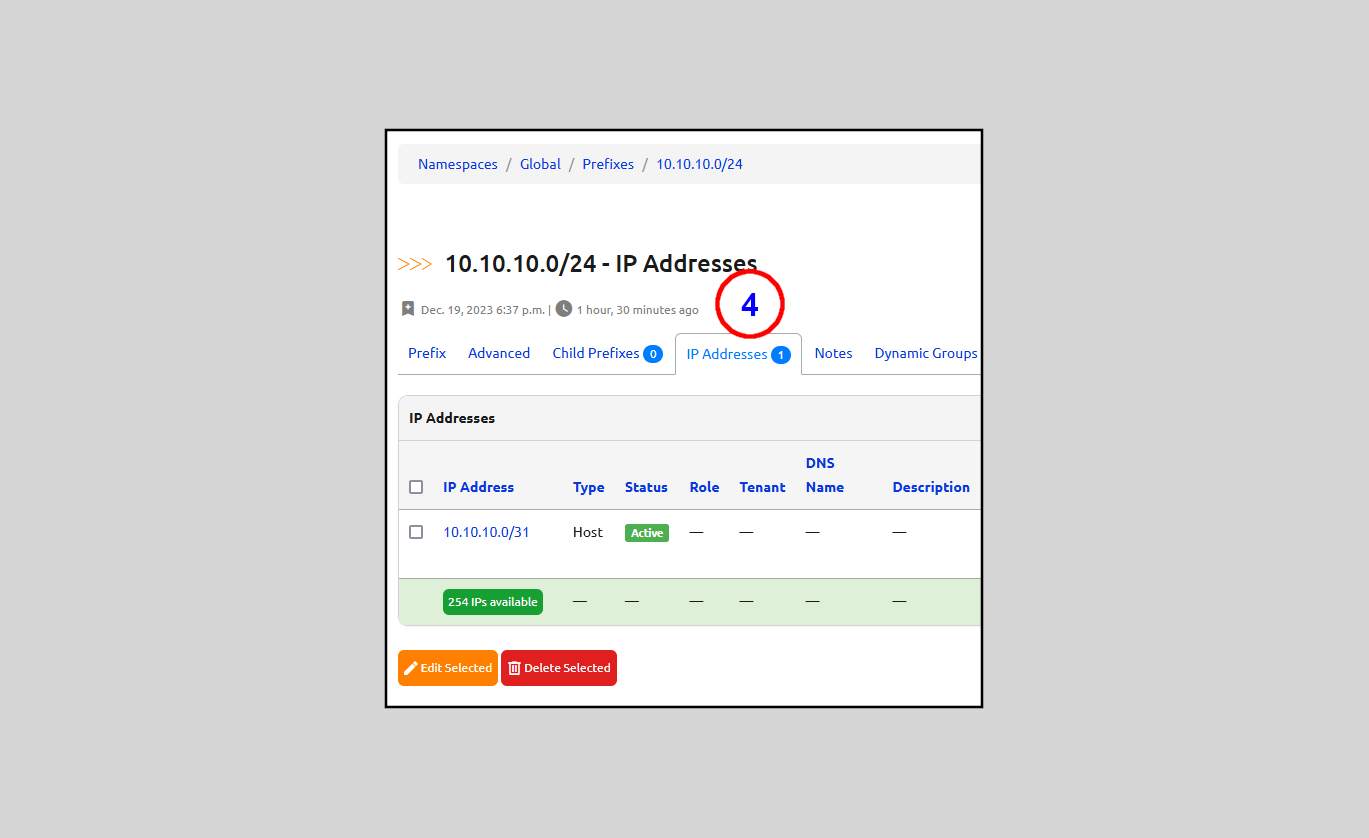
Finding IP Addresses in a Prefix
To find information on a particular Prefix:
- Click on IPAM in the left side navigation menu
- Click on Prefixes to get to the Prefixes main page
- Find the Prefix you are interested in and click on the link
- To view the available and allocated IP Addresses, click on the
IP Addressestab